sshOnWindows
Overview
In some situations, you may want to automate file deletion, copy files to different location in your c: drive or what ever the task may be.
You will need to enable SSH on your Windows so your script could connect to your Windows to automate the task.
This page will show you where to download OpenSSH for Windows, install it and set it up.
Download and Install
From https://github.com/PowerShell/Win32-OpenSSH/releases
Download the latest .zip of OpenSSH. The typical choice for Windows 2016 is to download the [OpenSSH-Win64.zip] option.
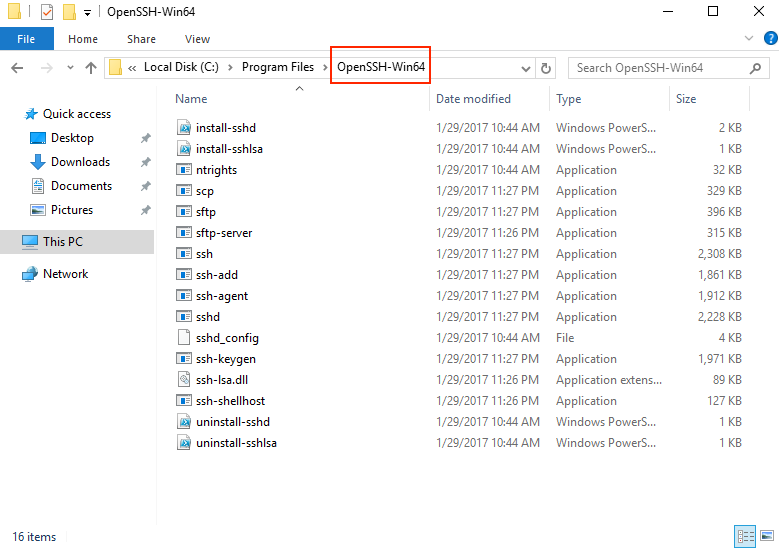
Extract the OpenSSH-Win64.zip file and save it on your console.
The easiest way to find it locally would be to save it in your [C:\Program Files\].
Setup
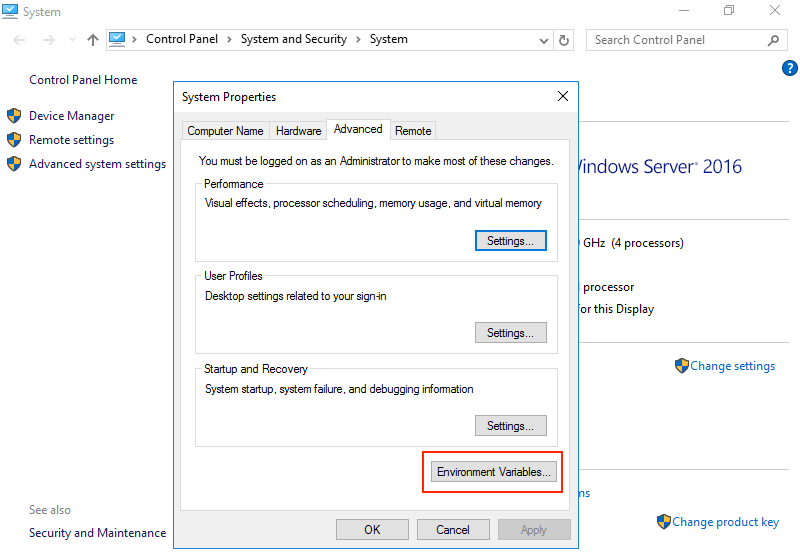
Go to Control Panel, System and Security, System
On the left, select Advanced system settings
The System Properties window will pop up. Click the Environment Variables button on the bottom
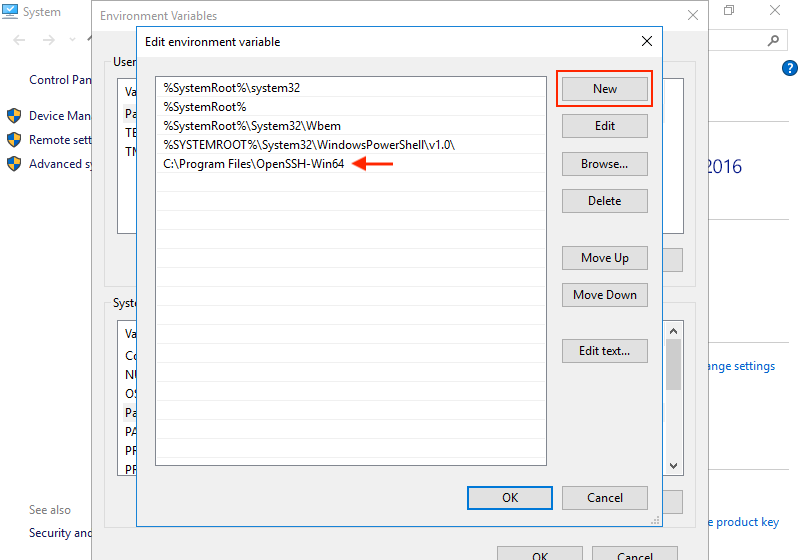
In the System Variables, select Path
Click on the Edit button

Click New. Add the OpenSSH folder path. After you have added the folder, you may now close the System Properties dialog
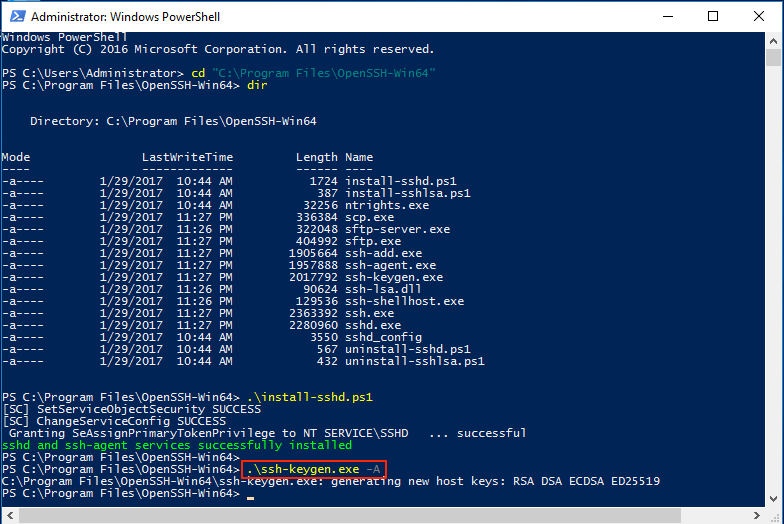
Run Powershell as an Administrator.
Enter the OpenSSH folder path. Run install-sshd.ps1
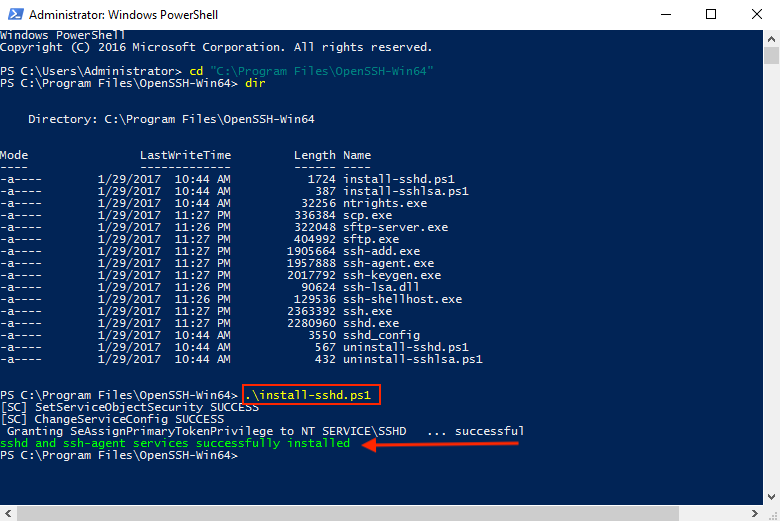
To generate a host key, run ssh-keygen.exe -A
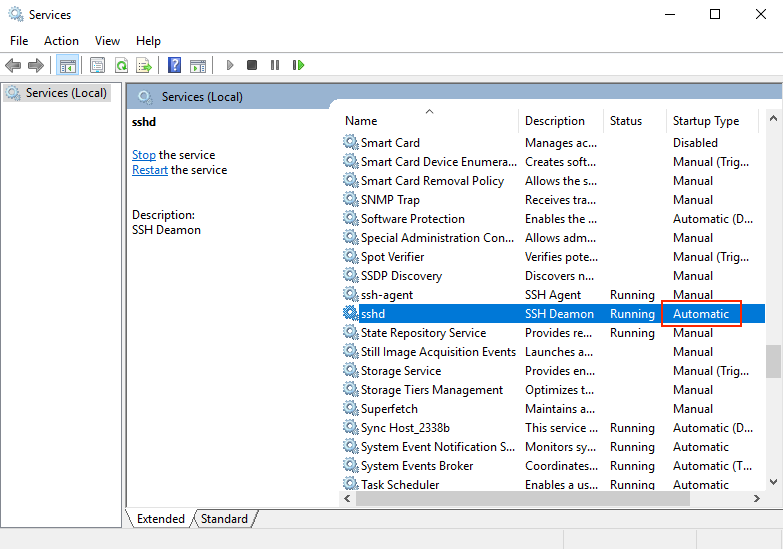
Go to Control Panel, System and Security, Administrative Tools.
Double click on Services
Start OpenSSH SSH Server and OpenSSH Authentication Agent
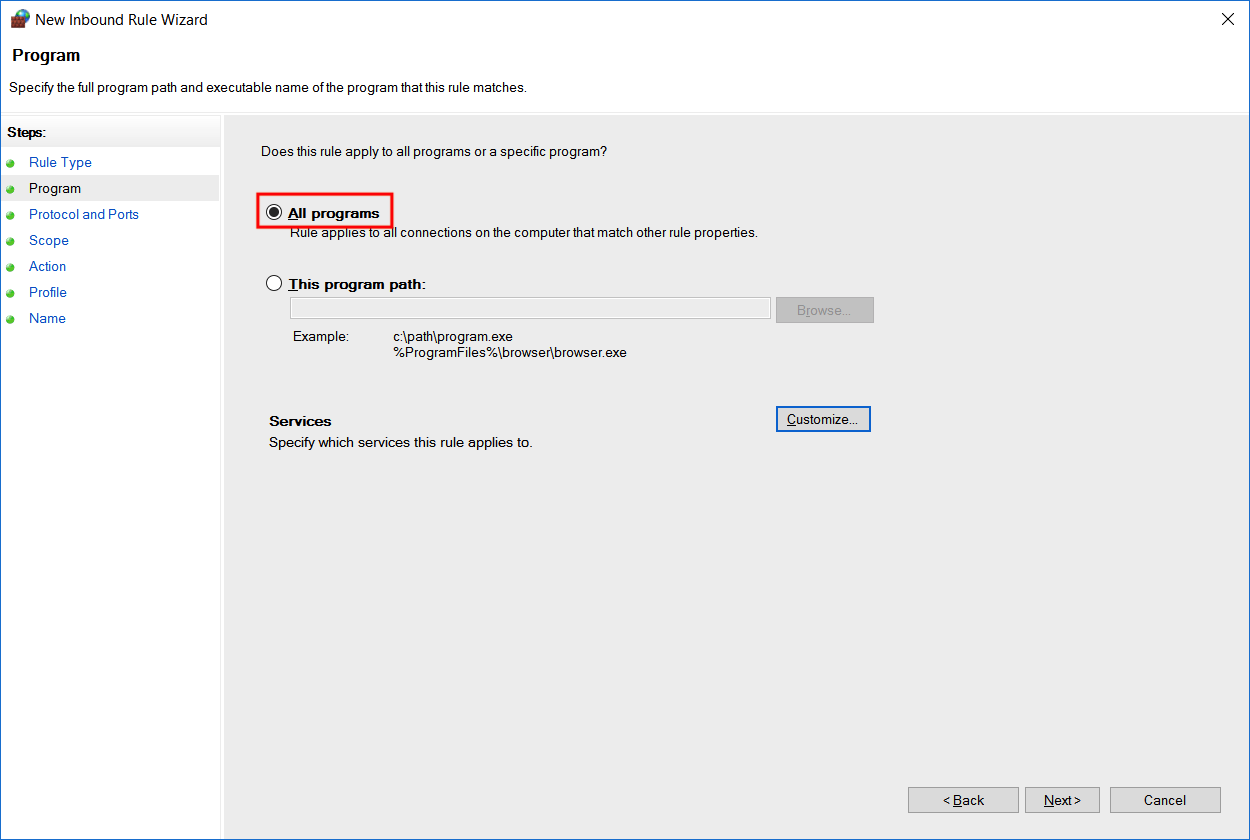
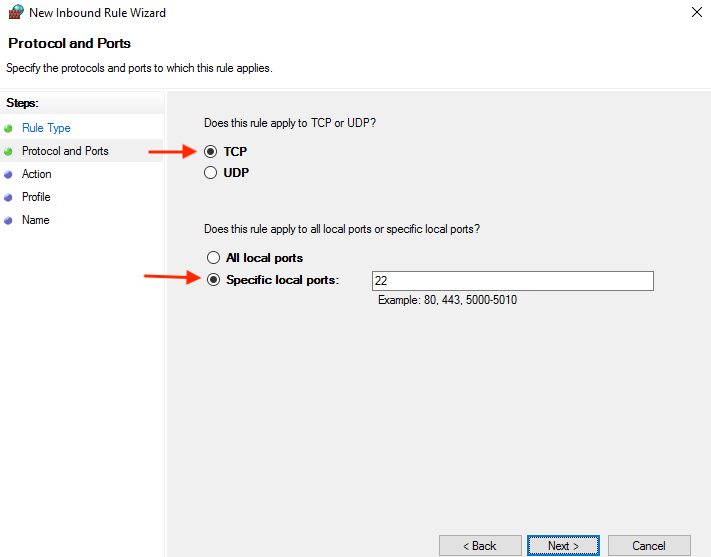
Configure Windows Firewall To Allow SSH
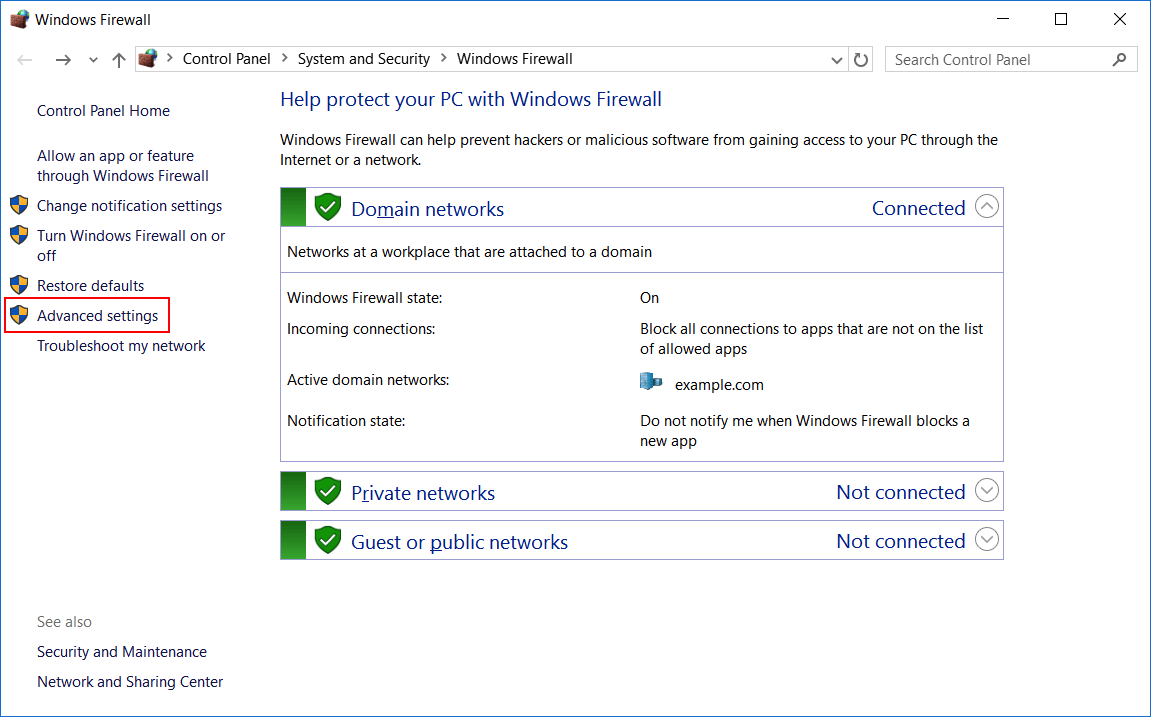
In Control Panel, System Security and select Windows Firewall.
Click on Advanced Settings on the left panel.
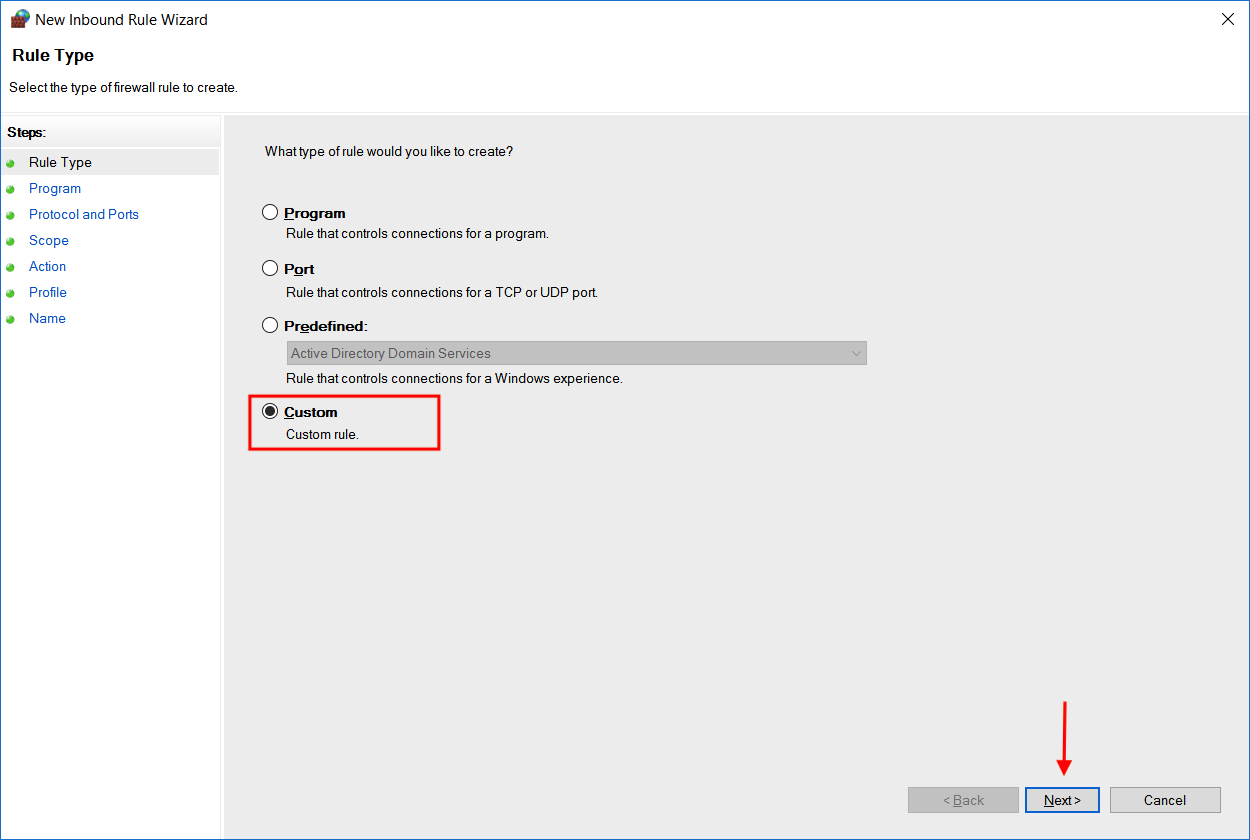
Select Inbound Rules from the menu on the left.
Select New Rules from the menu on the right.

You should have successfully installed and setup SSH on your Windows